Prop Design: Industrial Workflows in Blender
In entertainment design, props carry as much storytelling weight as characters. Whether you’re designing a sci-fi generator, a tactical drone, or a fantasy wagon, the prop must feel functional, lived-in, and grounded in its world.
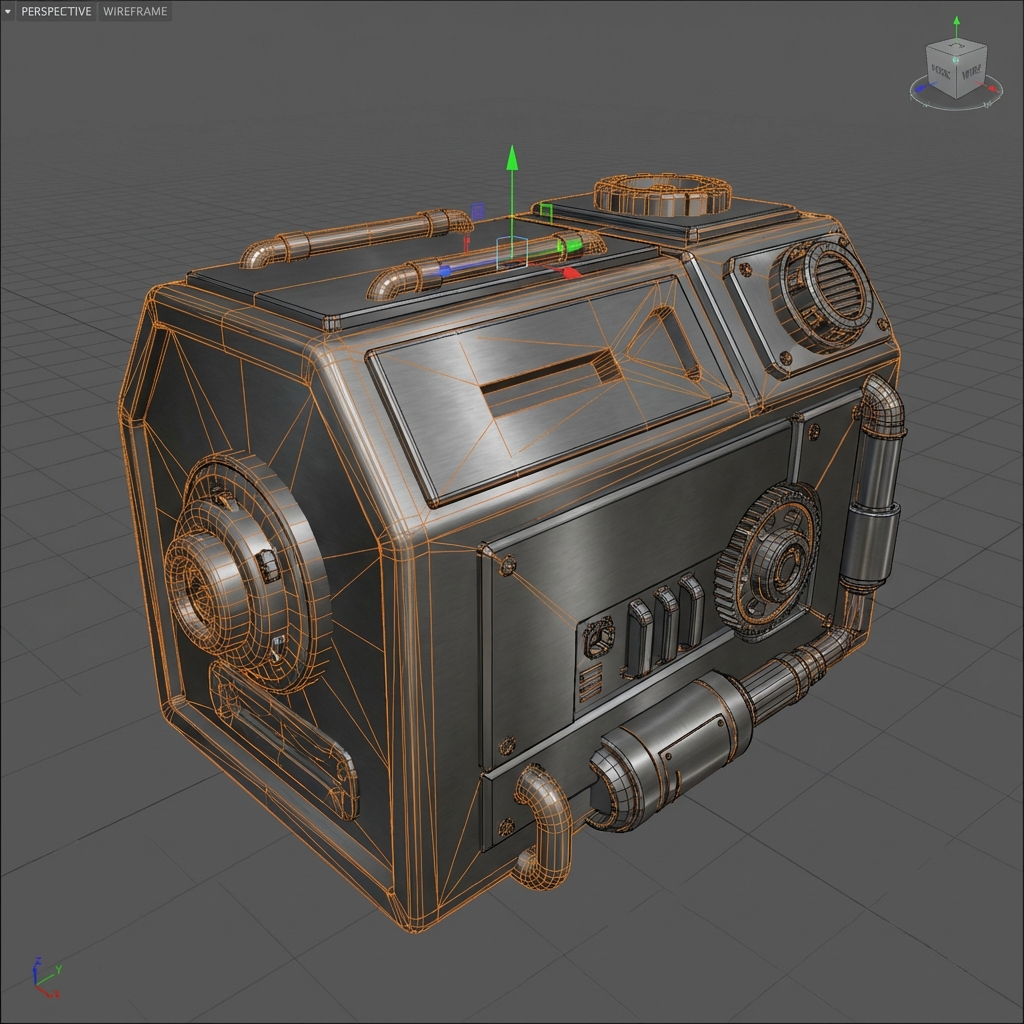
This guide outlines high-speed workflows in Blender for prop concepting—focusing on shape design, detail density, non-destructive editing, and production-ready visuals using smart shading and texturing tricks.
1. The Boolean-Driven Workflow
Boolean operations are the bread and butter of hard surface concept modeling. They let you block, cut, subtract, and refine large forms quickly without worrying about edge flow or clean topology.
Key Boolean Concepts
- Difference: Cuts a shape out of the base mesh.
- Union: Combines two meshes into one solid object.
- Intersect: Retains only the overlapping region of two objects.
Blender Setup
- Add a cube (base mesh) and cylinder (cutter).
- Select cube → Modifiers Panel → Add Boolean Modifier.
- Set Operation to Difference, choose the cutter.
- Set Cutter Display to Wireframe or Bounds for clarity.
Fast Workflow Add-ons
- BoxCutter: Lets you draw cutouts directly in the viewport.
- HardOps: Automates bevels, booleans, and shading setup.
- Machin3Tools: Offers viewport enhancements and smart mirroring.
2. Kitbashing: Detailing at Speed
Rather than modeling every component from scratch, use kitbashing to fill your designs with high-frequency detail fast.
Building Your Library
- Categories: Bolts, vents, pistons, panels, wires, decals, warning labels.
- Use Asset Browser → Mark as Asset → Organize into folders.
Best Practices
- Big Shapes First: Start with custom, silhouette-defining forms.
- Medium/Small Details: Pull from your kitbash library.
- Consistency: Match bevel sizes, material roughness, and spacing.
3. BMS (Big-Medium-Small) Shape Theory
Design rhythm is essential in mechanical aesthetics.
Ratios to Aim For
- 70% Large Forms: Overall body of the prop.
- 20% Medium Forms: Hatches, handles, panel breaks.
- 10% Small Forms: Screws, indicator lights, grime leaks.
Viewport Tip
- Use MatCaps to read shape contrast easily.
- Toggle X-Ray (
Alt + Z) to view inside assemblies.
4. Smart Shading: Tri-Planar Mapping
Don’t waste time unwrapping. Use Tri-Planar projection for instant surface texturing.
Node Setup
- Add Image Texture Node, set projection to Box.
- Add Texture Coordinate → Mapping Node → Image Texture.
- Plug into Base Color of your Principled BSDF.
- Set Blend = 0.2 to soften seams.
Application
- Use grungy metal maps, edge wear, rust, and decals.
- Add a Color Ramp to push contrast or tint.
- Combine with curvature or AO maps (bake or fake).
5. Wear, Function, and Storytelling
A well-designed prop suggests its use, manufacturer, and history.
Visual Function
- Handles: Should show grip wear.
- Edges: Chip paint, expose metal underneath.
- Screws and Hinges: Place logically where stress or movement would occur.
Narrative Texture Layers
- Add labels (e.g., “DO NOT TOUCH”) with emission or albedo decals.
- Use dirt masks to differentiate between “clean” and “used” zones.
- Simulate leaks with grunge alphas in normal or roughness channels.
6. Camera and Lighting for Concept Renders
Presentation is half the work. Render your prop with drama and clarity.
Setup
- Use 3-point lighting: Key, Fill, Rim.
- Use HDRIs to add ambient realism.
- Set Focal Length (e.g., 85mm) for product-style compression.
Next and Previous
- Previous: Mist Pass in Blender: Z‑Depth Workflow for Atmospheric Perspective in Photoshop
- Next: Advanced Concept Materials: Procedural Dirt & Edge Wear
Related tutorials
- Sci-Fi Trim Sheets in Blender: UV-First Modeling for Infinite Panel Detail
- Sci‑Fi Architecture in Blender: Greebles, Paneling, Arrays, Decals, and Scale Cues
- Vehicle Concept Art Materials: Paint Wear, Decals, Grime, and Story Damage
- Vehicle Design in Blender: Blockout, Scale, Camera Lenses, and Paintover-Ready Renders