Vehicle Concept Art Materials: Paint Wear, Decals, Grime, and Story Damage
A vehicle can have perfect modeling and still feel fake if the materials tell no story. Real vehicles show use: dust in crevices, chipped paint on leading edges, grease near joints, and decals that communicate ownership.
This guide teaches the high-demand material workflow for vehicles:
- where wear actually happens (not random scratches)
- decals that sell function and scale
- roughness variation (the realism switch)
- Blender procedural cheats + Photoshop polish
1. Wear Placement Logic (Where Damage Actually Happens)
Random scratches read as “texture brush.” Logical wear reads as history.
High-impact wear zones
- Leading edges: sand/wind impacts, chipping
- Steps/handles: human contact, paint worn through
- Joints/pistons: grease and grime build-up
- Undercarriage: mud, oil, corrosion
- Heat zones: discoloration near exhaust/engines
Rule: damage clusters where forces and contact happen.
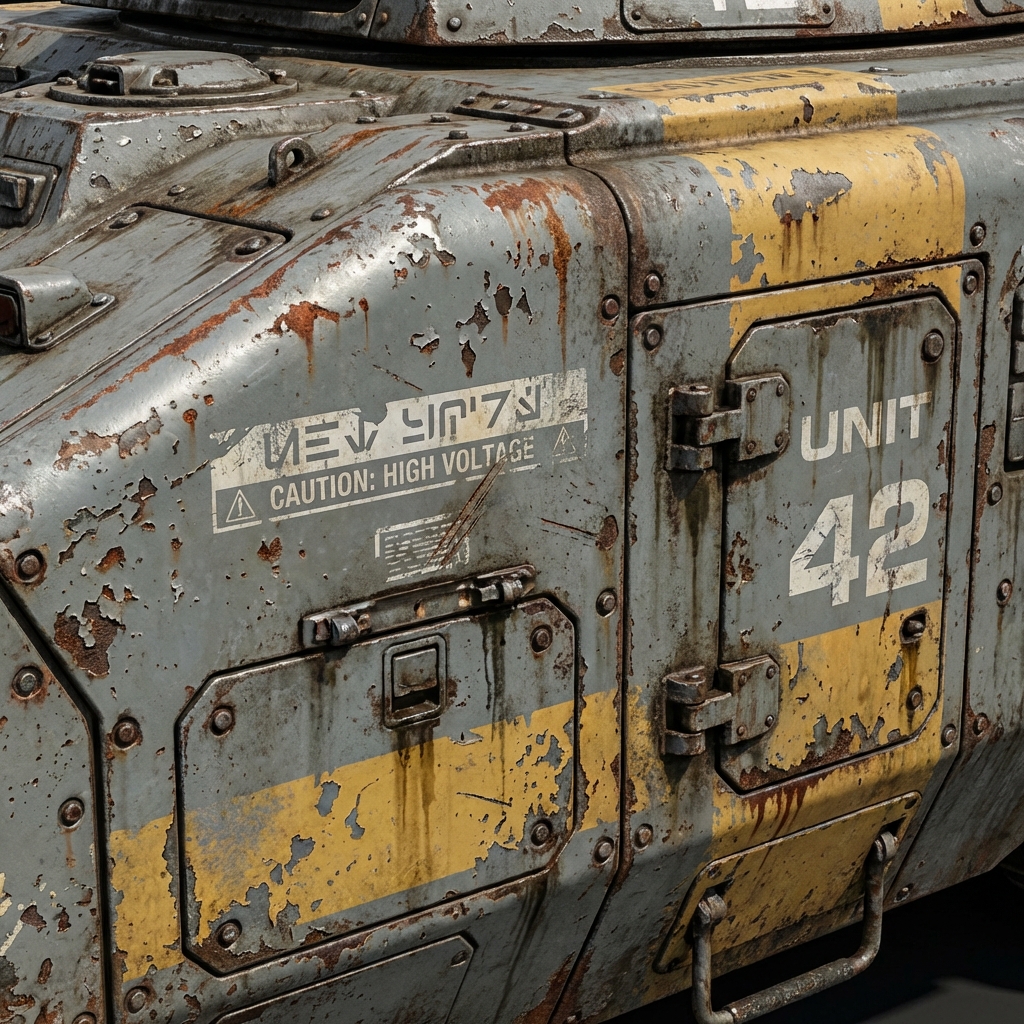
2. Decals That Sell Function (Not Decoration)
Decals are visual language.
Decal categories
- identification numbers
- warning labels
- hazard stripes
- maintenance notes
- faction/company logos
Placement rule
Place decals where humans would read them:
- near doors
- near access panels
- near controls
Pro tip: one bold marking + a few small warnings looks more believable than 20 logos.
3. Roughness Variation (The Realism Switch)
Uniform roughness = plastic.
Fast roughness variation method
- Create a subtle noise/grunge mask.
- Multiply it into roughness.
- Keep variation subtle; you want micro-breakup, not chaos.
Read logic
- oily/handled zones = lower roughness (shinier)
- dusty zones = higher roughness (matte)
4. Blender Cheats: Procedural Dirt + Edge Wear
If you have the vehicle in Blender, you can generate believable wear fast.
Dirt in crevices (AO method)
- Use Ambient Occlusion node as a mask.
- Mix in a dirt shader in corners.
Edge wear (bevel shader trick)
- Use Bevel node to detect edges.
- Use ColorRamp to isolate.
- Reveal metal under paint on edges.
Concept advantage: fast, editable, consistent.
5. Photoshop Polish: Story Damage Without Re-Rendering
Paint chips that make sense
- Chips appear on corners and leading edges.
- Vary chip size: a few big, many small.
- Use a mask so chips fade in shadow.
Streaks and gravity
- Rain streaks fall downward.
- Dust accumulates in sheltered zones.
- Oil leaks streak from joints.
Pro tip: streak direction tells physics. Get it right and the whole design feels grounded.
6. The “Lived-In Vehicle” Checklist
- Decals communicate role and scale
- Wear clusters logically
- Roughness variation breaks plastic look
- Heat zones and exhaust discoloration present (if relevant)
- Dirt builds in crevices and undercarriage
Exercises
- Take a clean vehicle render.
- Create 3 story variants:
- brand new factory
- civilian used
- warzone survivor
- Change only: decals + roughness + wear placement.
Next and Previous
- Previous: Vehicle Design in Blender: Blockout, Scale, Camera Lenses, and Paintover-Ready Renders
- Next: Creature Design for Concept Art: Silhouette, Shape Language, and Readable Monsters