Painting Skin for Concept Art: SSS, Facial Color Zones, and Realistic Specular Control
Skin is difficult because it’s not just a surface—it’s a layered material. Light penetrates, scatters through blood and tissue, then exits. If you paint skin like opaque plastic, it looks dead.
This guide covers practical, concept-art-friendly methods to simulate subsurface scattering (SSS) and paint living skin in both Photoshop and Blender.
1. The Big Picture: What Makes Skin Look Alive?
You need four things working together:
- Plane changes (form)
- Color variation (zones)
- Terminator warmth (SSS cue)
- Specular logic (oil/roughness)
If any one of these is missing, skin feels like wax, plastic, or clay.
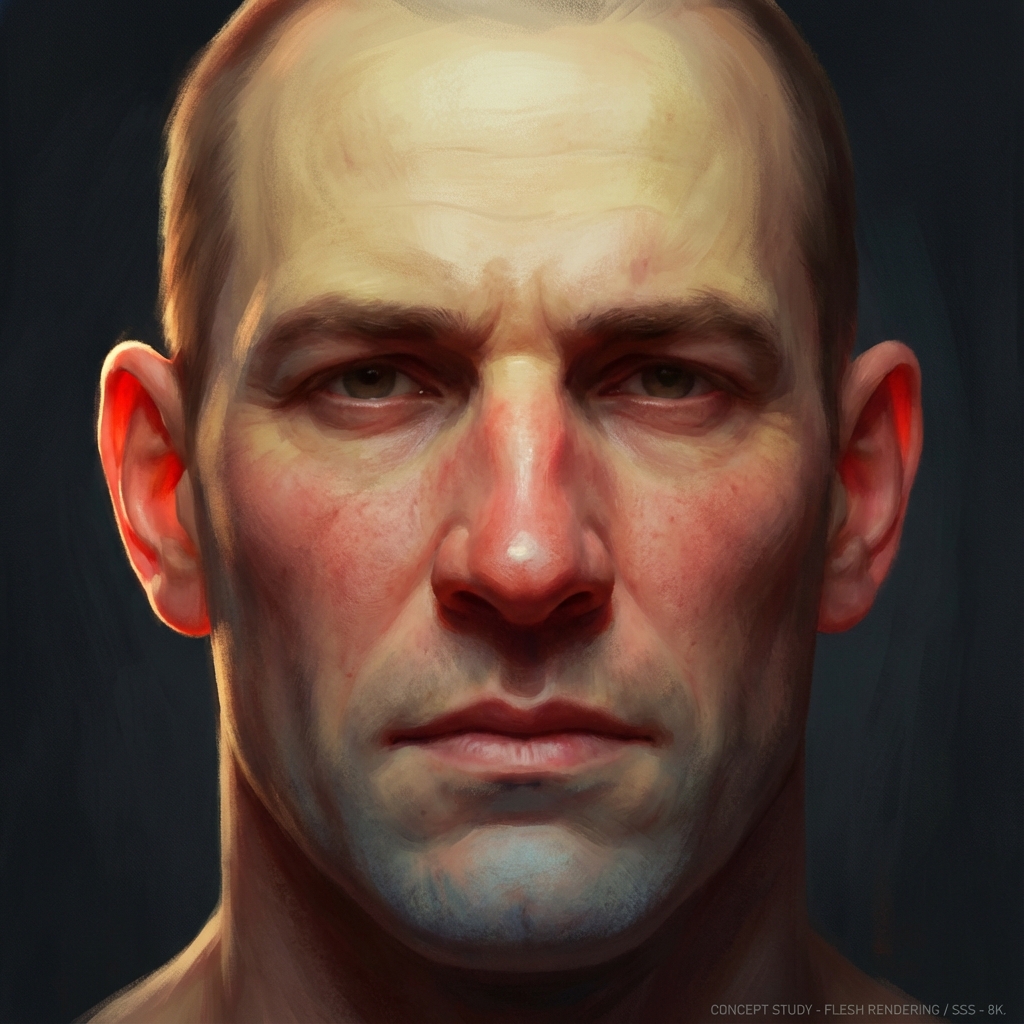
2. The 3 Classic Facial Color Zones
The face is not one hue. Even subtle shifts do huge work.
- Forehead (yellow/warmer + lighter): thin skin over bone
- Nose/Cheeks/Ears (red/pink + more saturated): blood flow near surface
- Jaw/Chin (cooler/greyer): thicker tissue; in some faces, stubble/follicles add coolness
How to apply this in painting
- Paint a neutral base first.
- On a new layer set to Color or Soft Light, glaze the zones gently.
- Keep it subtle: you’re guiding believability, not painting clown makeup.
3. The Terminator: Your Best SSS Shortcut
The terminator is the edge where light turns into shadow.
- On hard opaque materials, this edge is darker and sharper.
- On skin, the terminator often carries warm red/orange because light scatters through tissue.
Photoshop method (fast)
- Establish light and shadow cleanly.
- New layer: Overlay or Color.
- Choose a saturated orange/red.
- Paint a thin soft band along the shadow edge.
Result: instant “blood under skin” feeling.
4. Specular: Skin Is Not Matte
Skin has oils and micro-texture. Specular highlights depend on roughness, not just brightness.
The T-zone (oily)
- Forehead
- Nose
- Chin
These get:
- brighter, tighter highlights
- slightly sharper edge transitions
Cheeks/neck (softer)
- broader, softer highlights
- higher roughness look
Painting shortcut:
- Put highlights on a separate layer.
- Keep T-zone highlights smaller and brighter.
- Keep cheeks softer and less intense.
5. Skin Texture: Pores, Not Noise
Overdoing pore texture is a common beginner mistake.
Tasteful pore workflow
- Add subtle pore texture mostly in midtones.
- Keep it reduced in shadows and blown highlights.
Photoshop option:
- Use a pore photo overlay on Soft Light at 5–15%.
- Mask it to cheeks/forehead.
6. Blender: A Practical SSS Setup (Concept-Friendly)
You don’t need perfect skin shading—just believable cues.
Principled BSDF baseline (starting point)
- Subsurface: low-to-moderate (start small)
- Subsurface Color: warm red/orange bias
- Subsurface Radius: red scatters farther than green/blue
- Roughness: mid-range (skin is neither mirror nor chalk)
Pro tips
- Use an HDRI for soft bounce + a key light for direction.
- Add a subtle rim to show form.
- Add roughness variation with a noise texture (very subtle).
7. Lighting Matters More Than Your Brush
Skin behaves differently in different light.
Common lighting reads
- Overcast daylight: soft, low contrast, subtle SSS
- Warm interior: strong red/orange bounce and terminator warmth
- Neon/night: specular can dominate; keep form readable with value control
Exercises
- Paint the same head under 3 lighting conditions:
- overcast
- warm lamp
- blue night
- Keep values consistent; change only temperature and saturation.
Next and Previous
- Previous: Character Design: From Silhouette to Story
- Next: Mastering Photoshop for Concept Art: The Essential Workflow
Related tutorials
- Creature Design Anatomy: Hybrid Reference, Believable Biology, and Functional Monsters
- Creature Rendering for Concept Art: Fur, Scales, Wet Skin, and Material Hierarchy
- Render Recovery in Photoshop: Fix Lighting, Pose, Materials, and Composition Without Re-Rendering
- Breaking the CG Look: Pro Paintover Workflow in Photoshop (Smudge, Mixer Brush, Grain, Edge Control)